Preparation
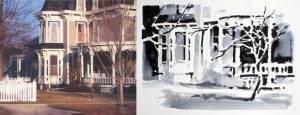
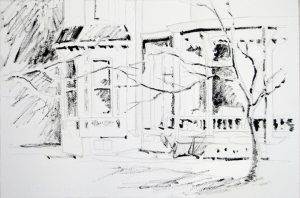
I first do a quick black and white ink-wash sketch to break the image into value shapes of dark, middle and light. (If you want to know more about this process, please see the reference links at the end of this article.) Notice that I have zoomed in on my subject to eliminate much of the detail and improve the overall design. Once my composition is worked out, I do a pencil outline drawing on 140 lb. cold press watercolor paper.
Black Line Drawing
Now the fun begins. On dry watercolor paper, with a wooden stick or Q-tip cotton swab dipped in black acrylic paint, I quickly lay in a high energy scribble drawing. The black is used as both line on the shadow side of objects, and as textural shading in dark and mid-value areas of the painting. Once the black is dry, it remains bold and undisturbed when watercolor washes are applied over it. This is a great way to begin a painting—it forces me to loosen up!
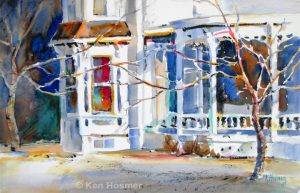
Watercolor Washes
Following the value pattern in the ink sketch reference, I add watercolor washes over the now dry acrylic. I like to begin with the darks. Remember the richest darks are those applied in one watercolor application and then left alone, as layered dark washes tend to become muddy.
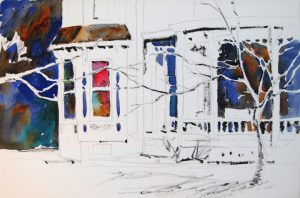
After the darks, I wash in the middle value areas. At this stage, any area left as white paper in the ink sketch is saved as white in the watercolor painting. Don't get in a hurry to add color to the lights, as this is better done at the end of the painting.
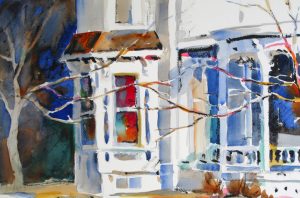
Corrective Adjustments
I decide that the large dark area on the left side of the painting isn't working and the space needs to be softened and broken up, perhaps with a tree shape to go with the lone branch.
Using a wet, Cheap Joe's Paint-Erase sponge I removed a two inch strip of paint from the mid-left edge of the painting. (The Mr. Clean Magic Eraser sponge also works well for removing paint.) After the lifted area dries, I pencil in a tree shape, then negatively repaint the area behind the new tree. Note that the original black acrylic texture remains intact and was not lifted or disturbed during this process.
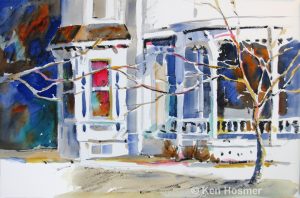
White Paper
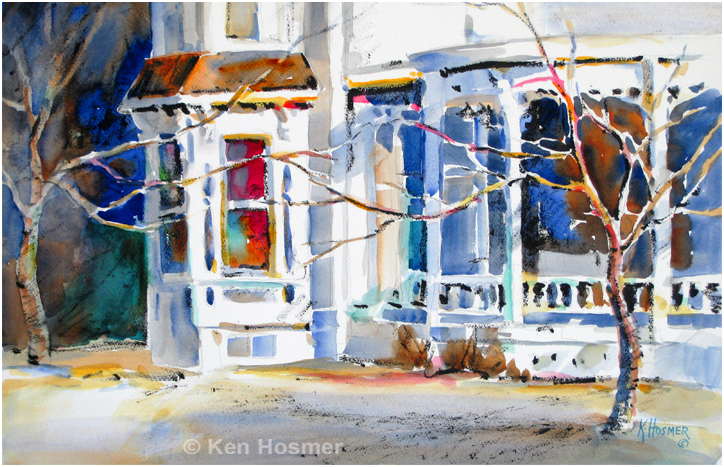
The last stage of the painting is to adjust the remaining pure white paper areas. I now add light washes to soften some of the whites. However, in each area as I add pale color washes, I leave part of that area pure white. The white paper is visually striking and adds punch to the painting. This is one of the tricks for brilliant watercolor.
Lastly, I added a few additional bits of black acrylic texture.
The final painting, Victorian Charm, is both loose and colorful. This is one of my watercolor demonstration paintings completed during a recent workshop at the Hill Country Arts Foundation in Ingram, Texas.
Links to more information:
Art-blog: How to Plan Your Painting with the Simple Ink Sketch
